How I Edit: Pre-Processing the Audio
Posted 11 years, 8 weeks ago.
The best way to get clean audio is to do everything you can to improve the basic recording: don’t record in a room where echo is present, close the doors so you don’t get noise from outside, and ensure that you use something other than the mic built into your monitor or laptop.
But even then, there is noise that can make it onto the recording. For a long time I used a Macbook Pro that had begun showing it’s age by revving up the fans as it tried to stay cool during a recording. Depending on the weather, you might have noise from an air conditioner. You might even just have low-end equipment which presents some noise in the background.
All of this will make editing difficult, and in some cases can be distracting or annoying, so you’ll want to get rid of it.
For this, I use Audacity to do some basic processing work on my audio tracks before loading them into my editing tool. I do this process for each track individually (I typically have one for each host you hear).
It should be noted that I use version 2.0.6, which is still available for download, fortunately. This version seems to do a way better (and faster) job at processing audio than the newest version (2.1.0 at time of writing), which causes odd variations in gain for me.
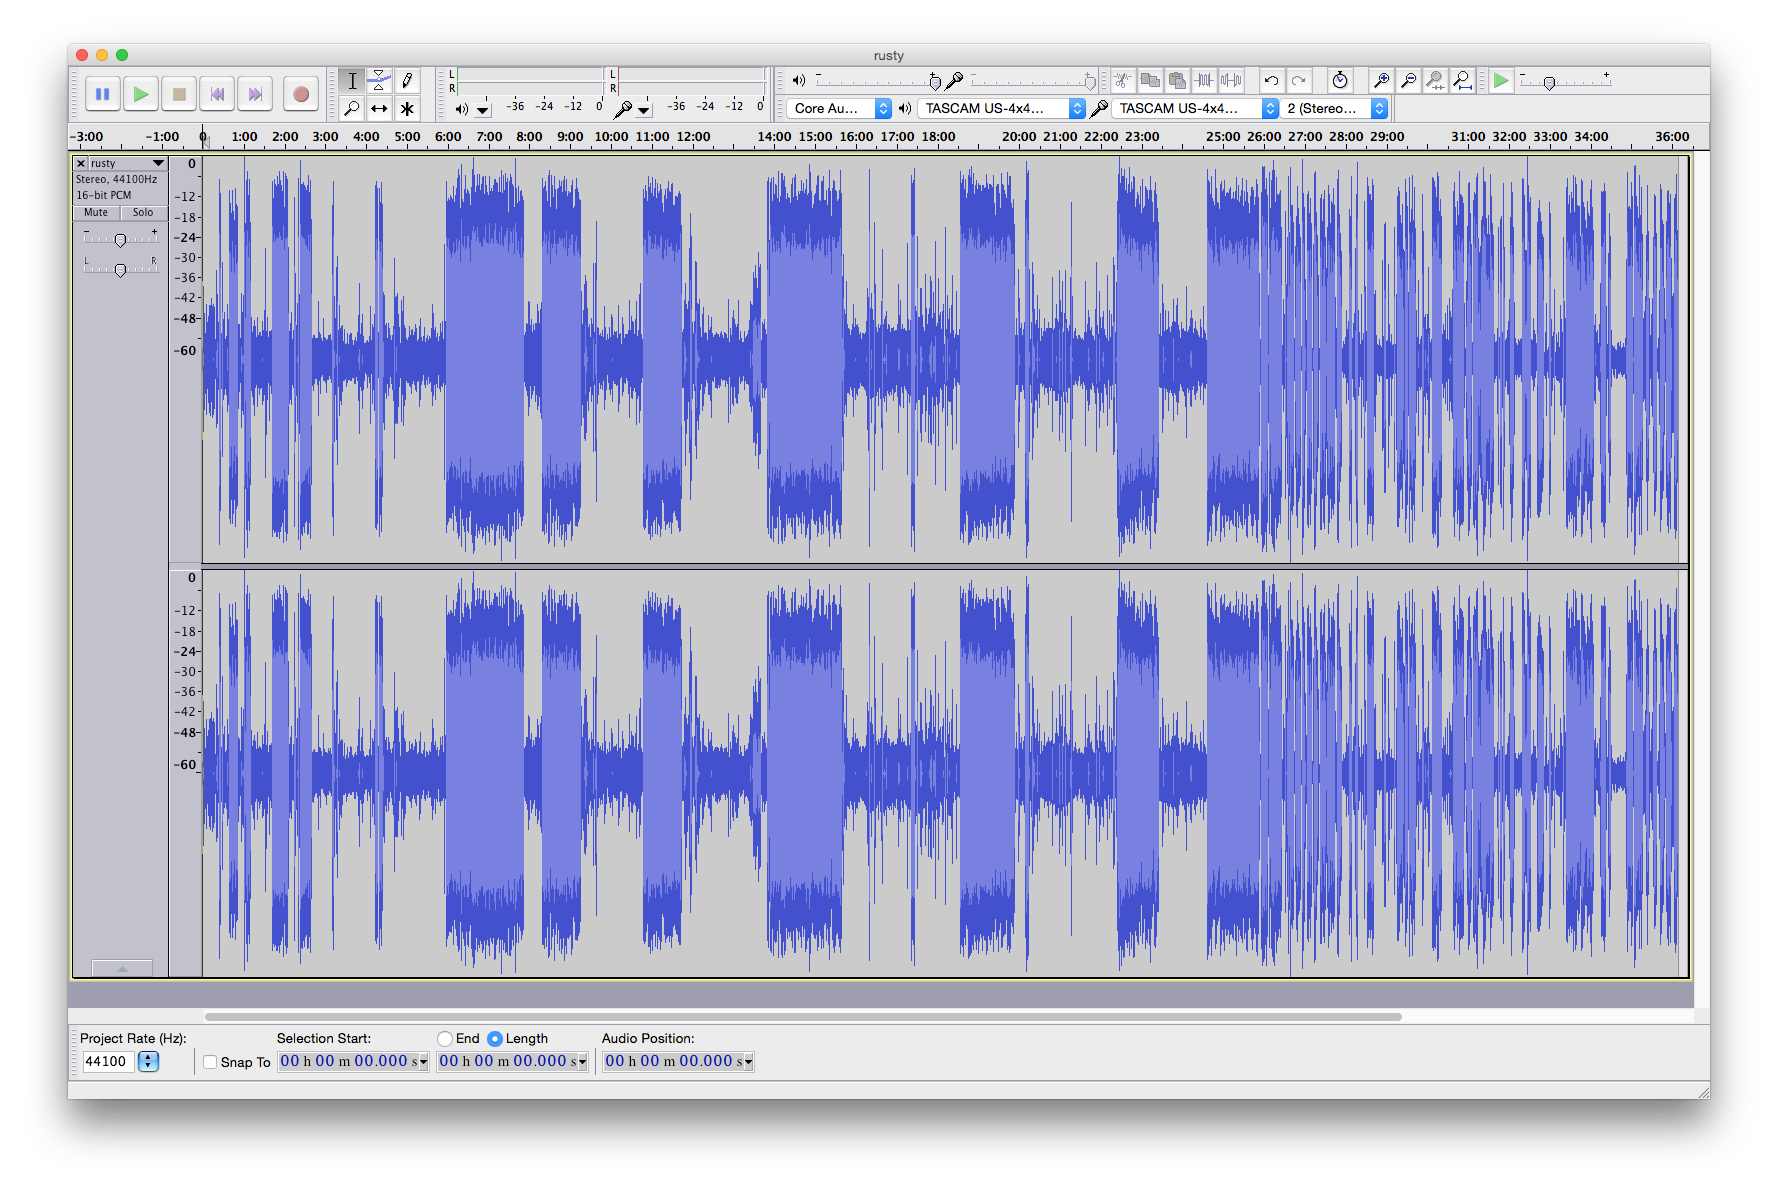
The unprocessed audio for Rusty on an upcoming episode of Topical
You might notice that Rusty’s audio in the screenshot above is a stereo track, even though both sides are identical. For the purposes of our podcast I don’t require two channel audio, so I like to convert it to mono first-thing. Mostly because I’m weird. To do that, make sure the track is selected by clicking on it and selecting Tracks > Stereo Track to Mono.
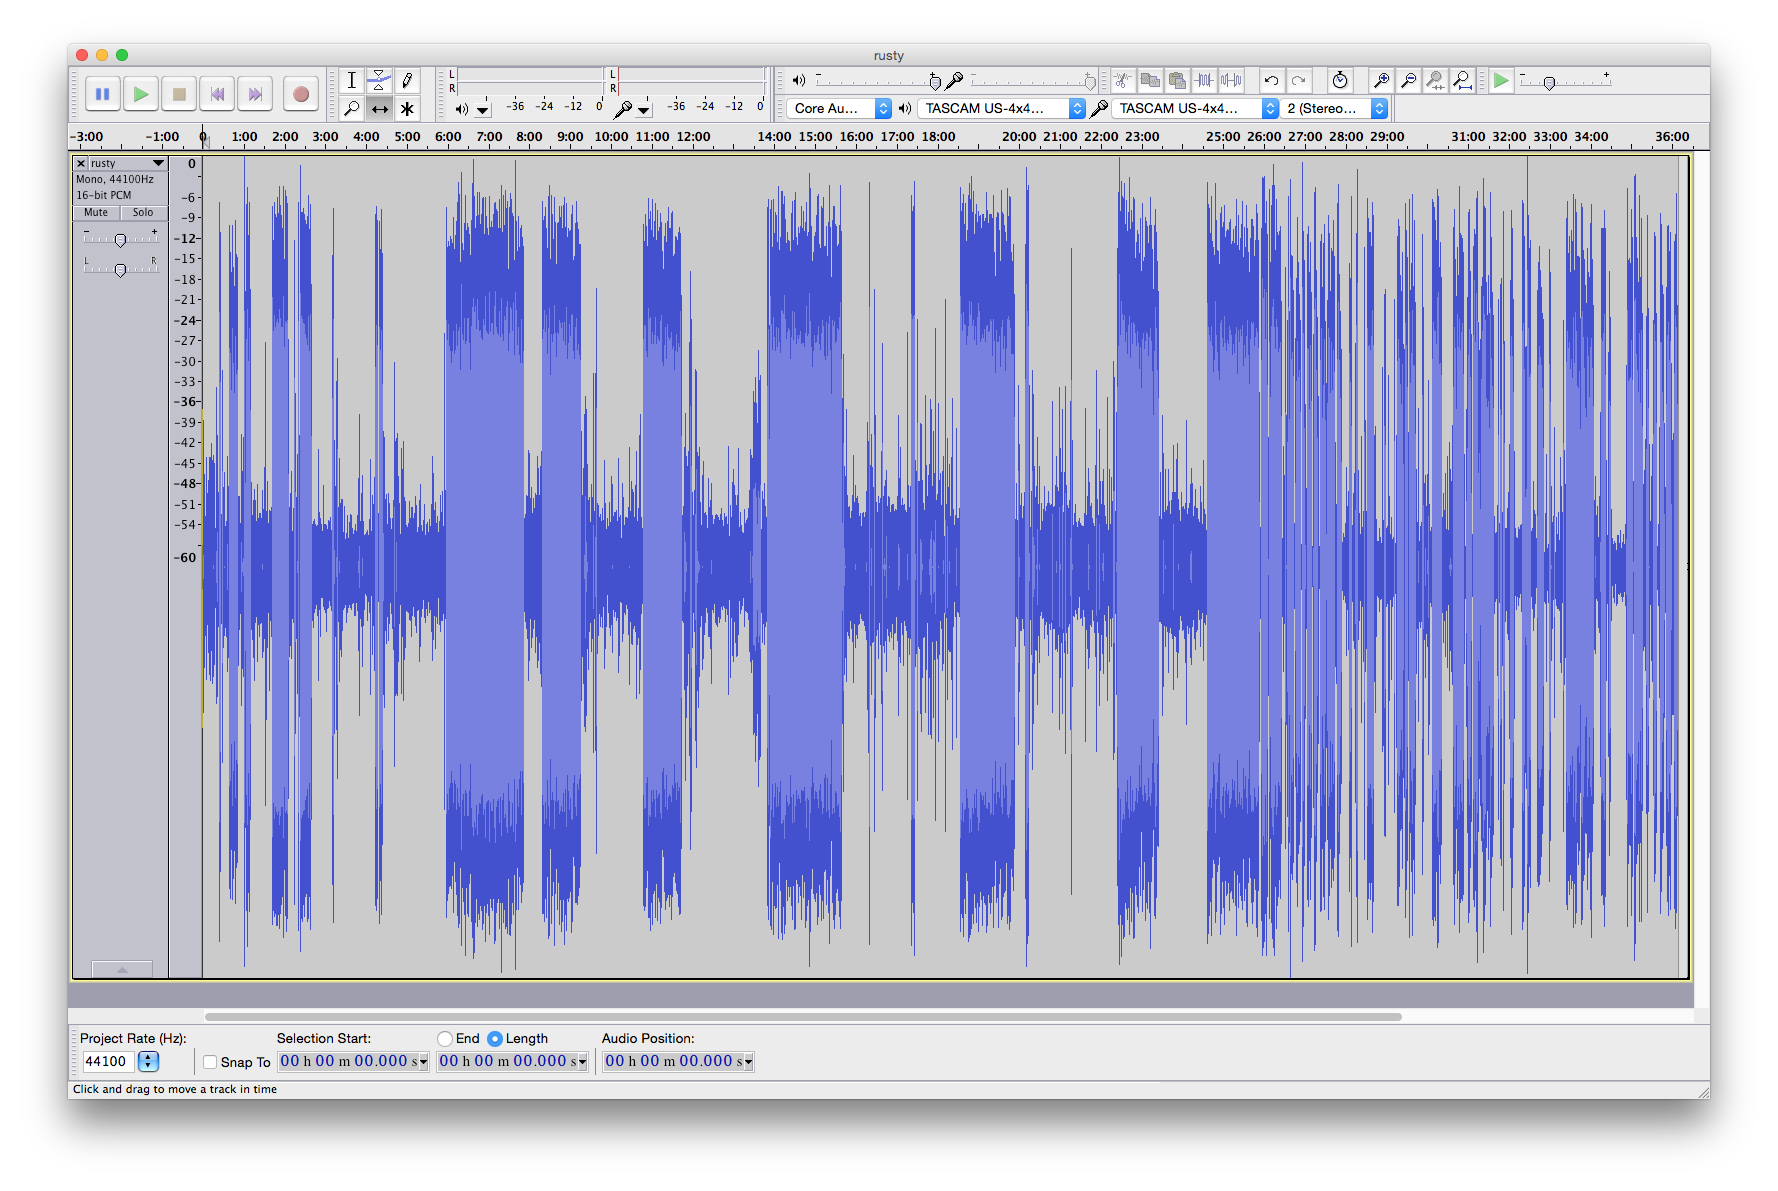
A small improvement.
The next thing you’ll notice is that Rusty’s audio has two main “states”. The obvious one is where he’s speaking, which is the big parts of the wave form. The smaller parts are usually him listening to what I’m saying (or napping, possibly?). But ideally, these should be completely flat. What this means is we have some background noise present. Let’s listen to a small sample.
It’s faint (you might need headphones and a bit of a volume boost to hear it), but yeah, that’s no good. To help clean this up, we use one of my favourite tools, and the main reason Audacity is still a part of my editing process: the Noise Removal effect.
Using it is actually really simple: first, zoom in to one of those quiet moments, and select a small amount of “silence”. Ideally the more you select, the better, but a second or two will do the job.
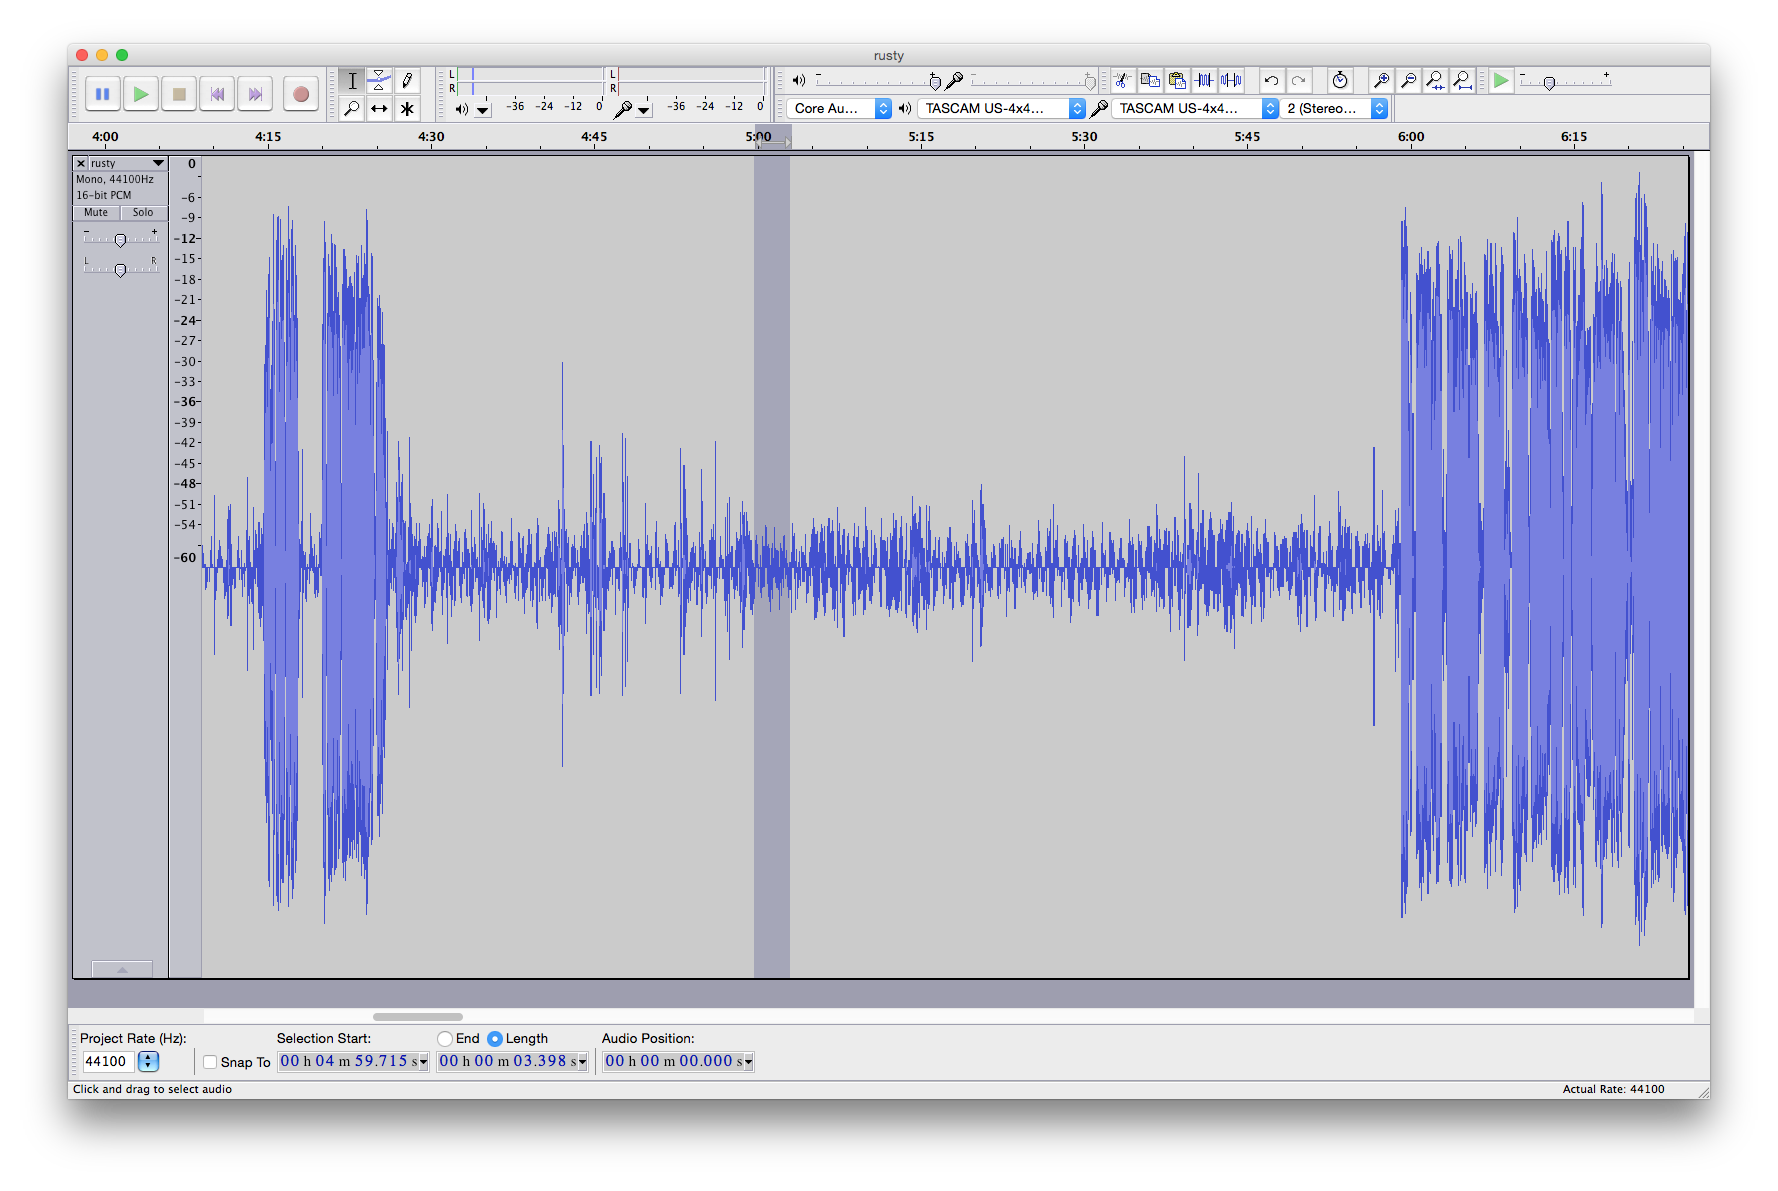
Selecting some of the "silence".
Now go to Effects > Noise Removal. You’ll get a window with some settings, and a button at the top labelled “Get Noise Profile”. This tool actually takes two steps, which is why we selected a snippet of audio first.
Click the “Get Noise Profile” button. This actually analyses the audio you selected and finds repeating patterns, like the ambient sound heard in the short clip I embedded above.
Once it’s done, select the whole track by clicking on the track head on the left hand side (or you can deselect by using the “I” bar tool anywhere within the track itself). Then go back into the Noise Removal dialog, and apply some settings before hitting OK. I’ve included a screenshot of mine below, but you might find that slight adjustments are needed to get the best out of your audio. Don’t be afraid to undo and try again.
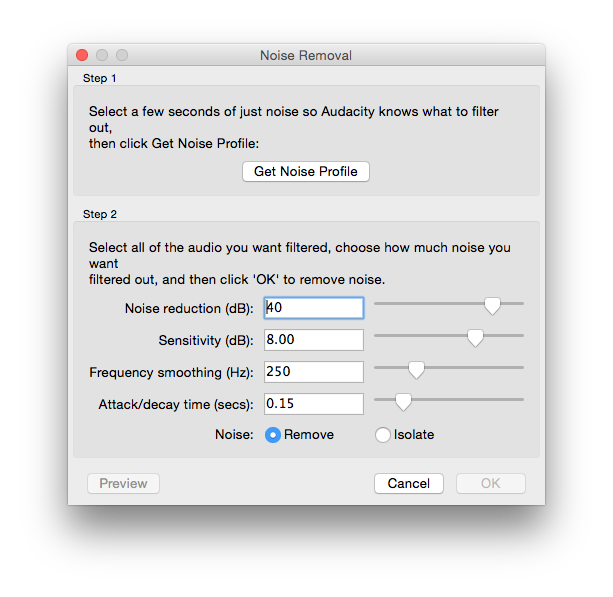
My Noise Removal settings dialog.
When it’s done, you should notice all that noise has been replaced by blissful silence.
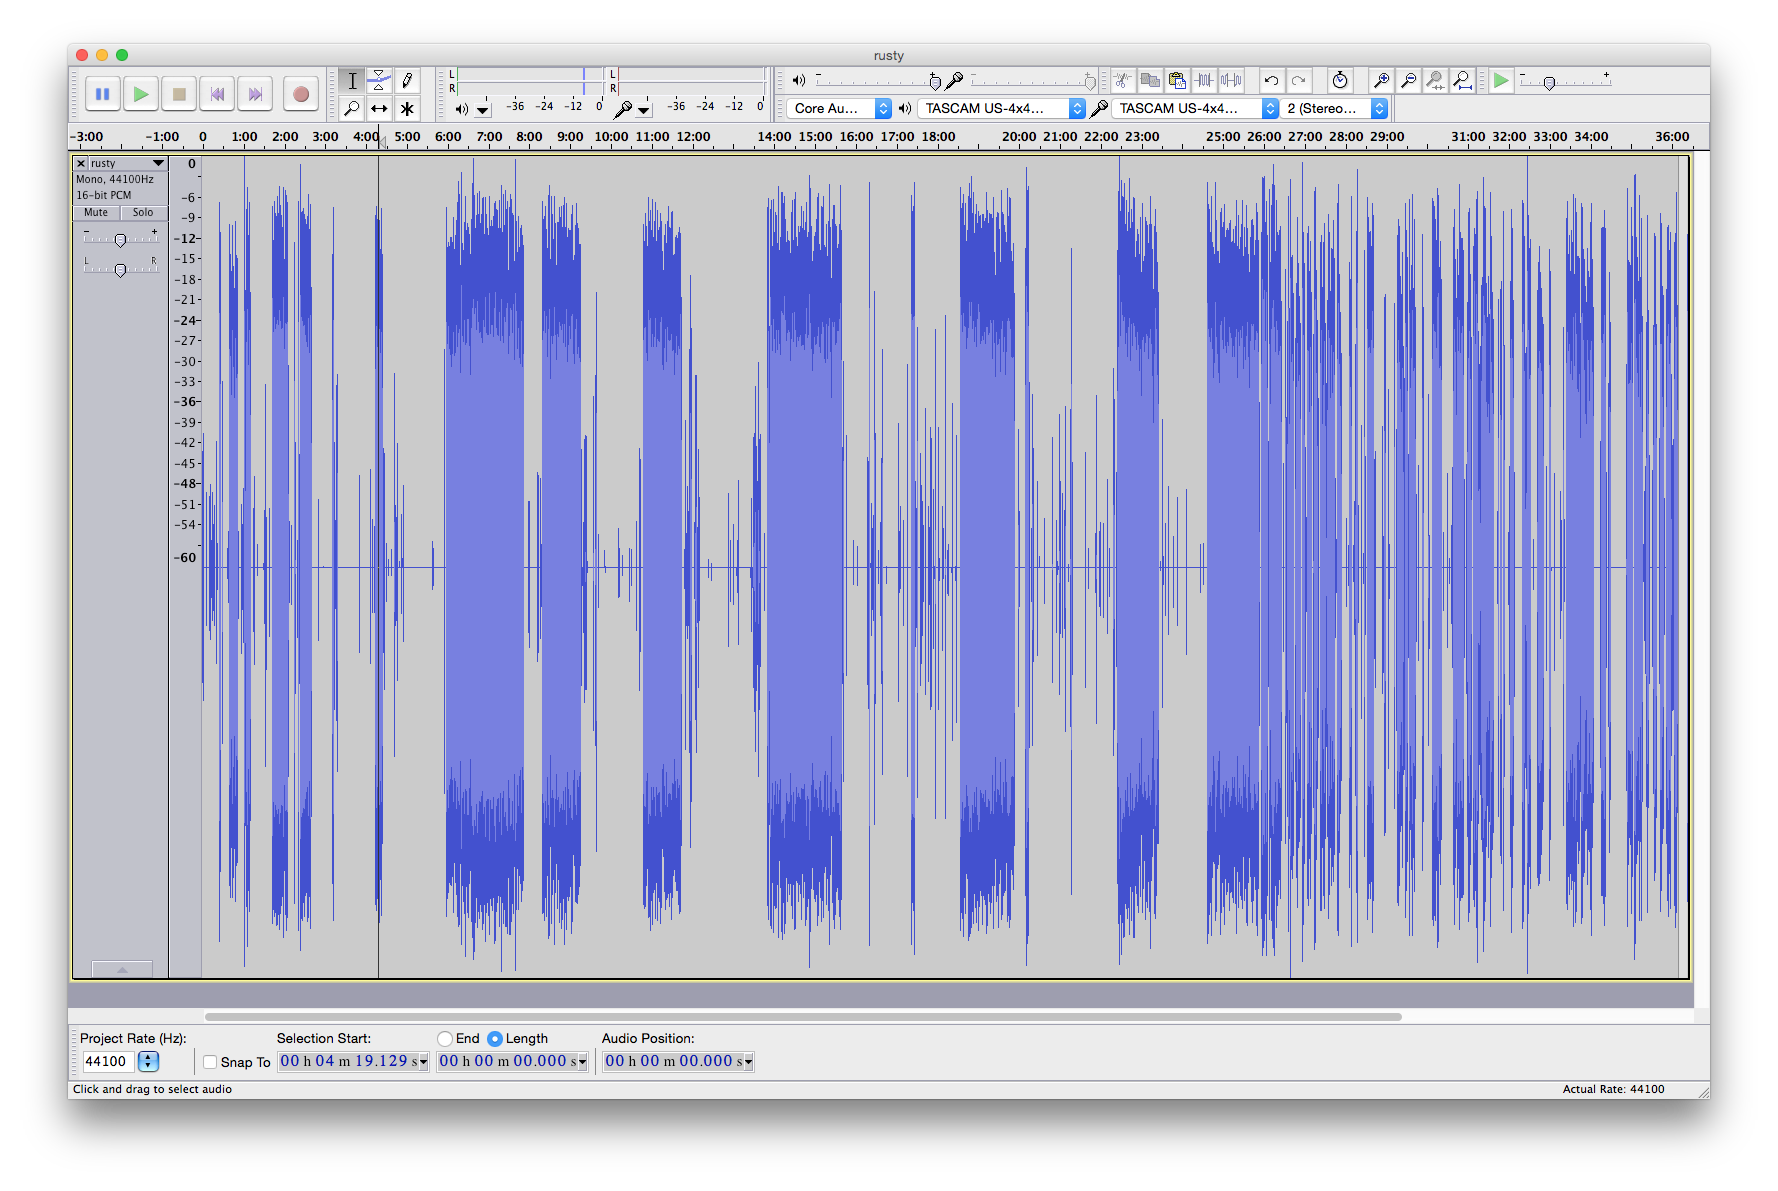
Hot dang, that’s some sweet looking audio forms right there.
Following this, I typically also run the “Amplify” tool on audio that is recorded at low gain. You can access this from Effects > Amplify…. This tool is the easiest thing you’ll do on your audio. It pre-calculates the “Amplification” value for you so that the highest peak will sit at 0dB. As long as you never tick the “Allow clipping” box, and the “New Peak Amplitude” value is at 0, you shouldn’t need to touch a thing. Just hit OK.
Some audio (like Rusty’s, usually… he’s a loud mouth) won’t need any amplification, and both values will come up as zero when you open the tool. If that’s the case, don’t worry about running amplification. The track is already as amped as it needs to be.
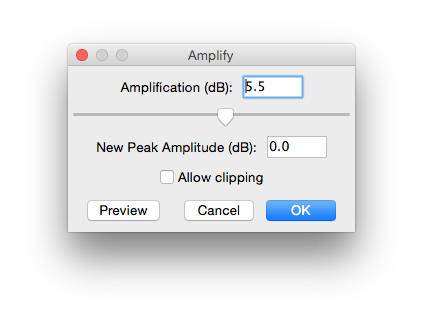
Pro tip: Never, ever, EVER check the "Allow clipping" checkbox.
The only other processing I do with the audio at this point is compression. If you’ve got any audio experience, or perhaps musical experience, you should know that compression in this regard is different to compressing files or images. What it actually does is adjust the volumes of everything to be a little more even across the board.
I try not to go too overboard with this, as I do some amount of compression elsewhere too. Also, the goal here is not to end up with overly processed audio. Just something that’s easier to work with.
Audacity’s compression tool is actually found under Effects > Compressor, and you’ll get a dialog not unlike the following.
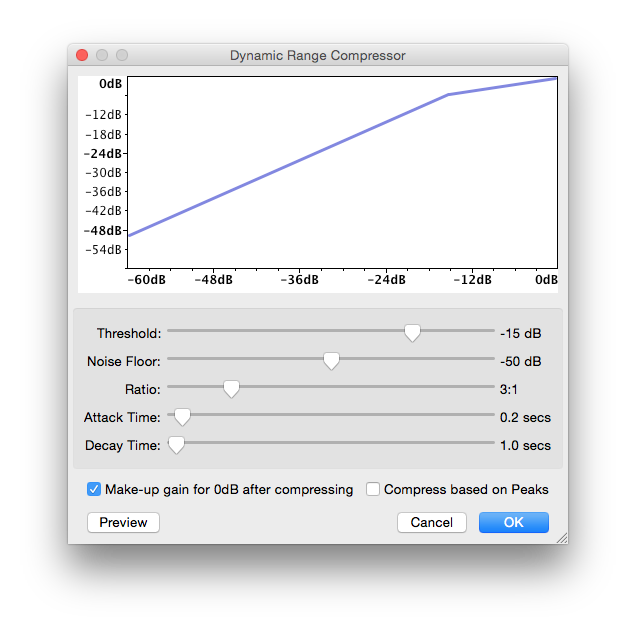
My Dynamic Range Compressor settings dialog.
Once again, adjusting the settings will give you slightly different results, and you may find you can get better audio by playing with it. Undo is your friends, kids.
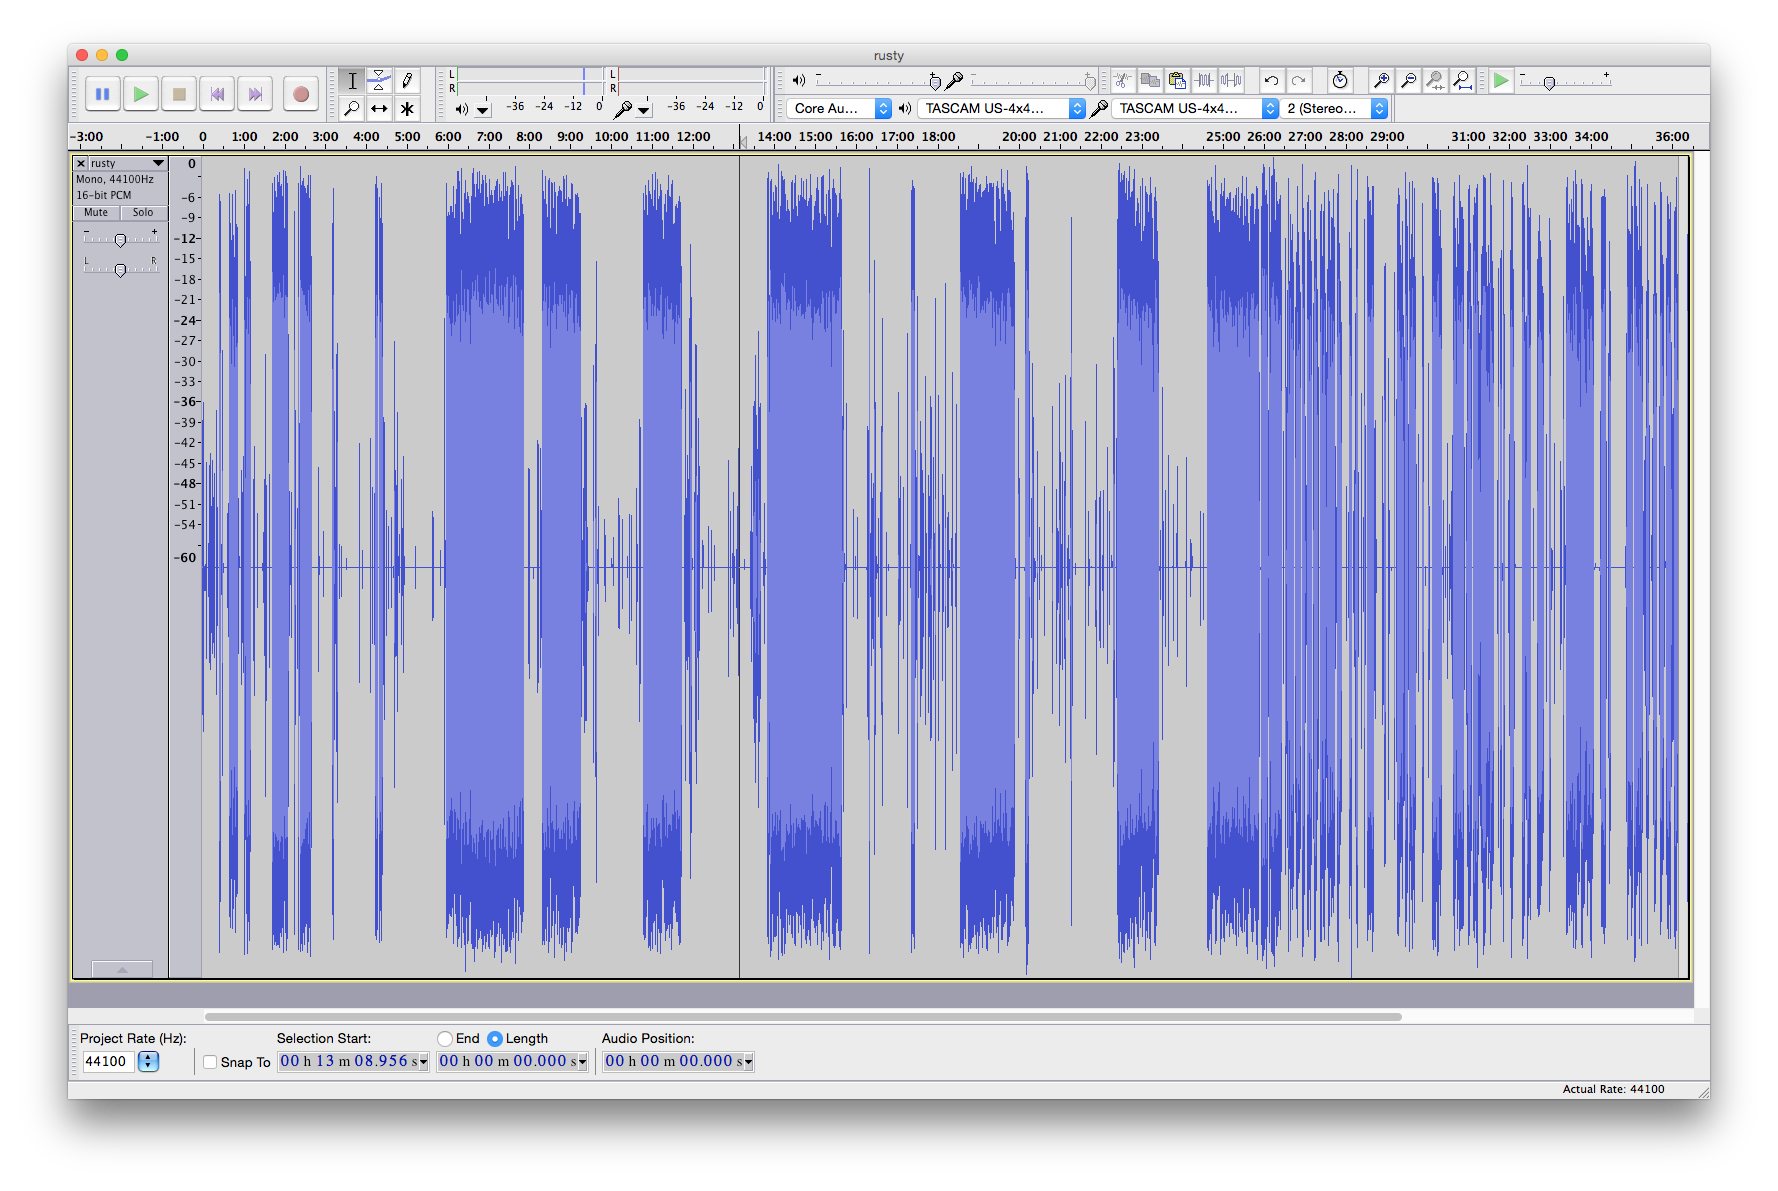
The final audio.
The difference is subtle, but definitely an improvement. Notice how there aren’t any stray parts extending to the top and bottom of the track. Everything is even. This is just what we want.
The final stage is to get this track out of Audacity. Using File > Export…, save the file as an “AIFF (Apple) signed 16 bit PCM” file. This is an uncompressed (the file kind of compression) format which means your quality during the rest of the editing process will be the best it can. We’ll worry about using a compressed format (like MP3) later. As for the “Enter Metadata” screen of this process, I skip it by hitting OK immediately, as it’s not necessary at this stage.
Once you’ve done this on all your tracks, you’re about as ready as I usually am to start the actual cutting process. Congratulations! You have nice, clean audio.
Other Posts in the “How I Edit” Series
- How I Edit
- Pre-Processing the Audio (This Post)
- The Basics of Editing
- Stitching Words
- Finishing Up